Designing Stained Glass
Do you have an eye for art and creativity? Do you want to express yourself through unique designs and vibrant colors? Then stained glass may be the perfect craft for you.
Stained glass is an art form that dates back centuries, and it’s still going strong today. You can create beautiful stained glass pieces that will be admired for generations to come. It’s a great way to unleash your inner artist and create a masterpiece that will be cherished for years!
In this article, we’ll discuss everything you need to know about designing stained glass. From the different types of glass to the design process and safety tips, we’ll cover it all. So let’s get started!
Introduction to Stained Glass
Stained glass is a form of art that involves creating designs with pieces of colored glass. The glass pieces are held together with lead came, which is a metal encasing. The pieces are then soldered together with a soldering iron.
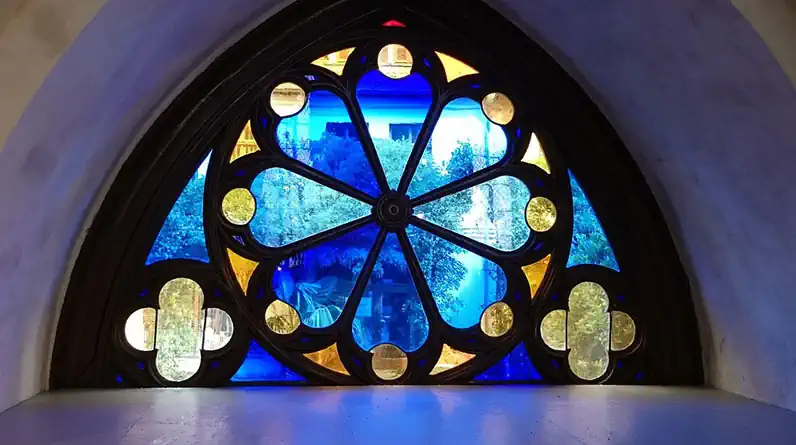
When light passes through the stained glass pieces, it creates an incredible effect. The sunlight passes through the colored glass, creating a mesmerizing pattern of light and color. It’s truly a unique and beautiful art form.
Stained glass can be used to create stunning pieces of art, such as windows, lamps, and other decorative items. It’s a great way to express yourself creatively and create something that will be admired for years to come.
Types of Glass to Use for Stained Glass
When it comes to stained glass, there are a few different types of glass you can use. The most common type of glass is called “float glass”, which is a clear glass that has been treated with chemicals to make it more durable. This type of glass is usually the most affordable option.
You can also use colored glass for your stained glass project. Colored glass comes in a variety of colors and textures, and it can give your project a unique look.
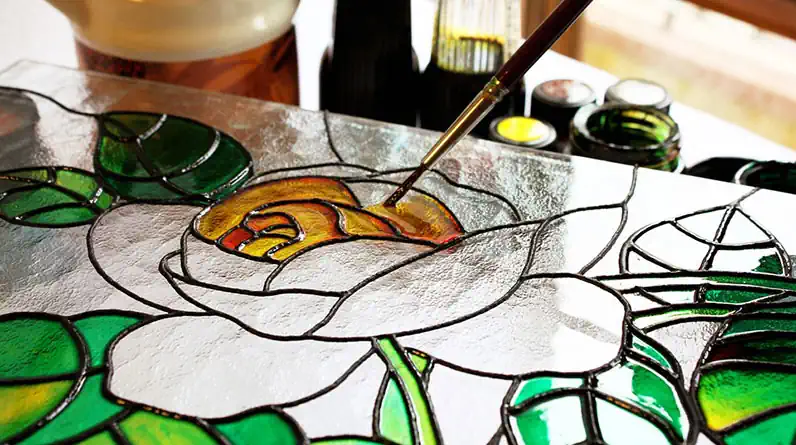
If you’re feeling adventurous, you could even try using stained glass that has been painted or etched. This type of glass can be more expensive, but it will give your project a one-of-a-kind look.
No matter which type of glass you choose, make sure it’s suitable for stained glass. If the glass is too thin or too thick, it won’t work well for stained glass.
Tools and Materials Needed for Stained Glass
Before you start your stained glass project, you’ll need to gather the right tools and materials.
Here’s a list of the items you’ll need:
- Glass Cutter
- Soldering Iron
- Lead Came
- Copper Foil
- Safety Glasses
- Ruler
- Cutting Mat
- Cutter Oil
- Flux
- Tinning Compound
- Lead-Free Solder
Once you have all the necessary tools and materials, you’ll be ready to start designing your stained glass piece.
Safety Tips for Working with Glass
Safety is always a priority when working with glass.
Here are some safety tips to keep in mind:
- Always wear safety glasses when cutting glass.
- Keep your work area clean and organized.
- Use a cutting mat to protect your work surface.
- Never leave your tools unattended.
- Keep tools away from children.
- Work in a well-ventilated area.
By following these safety tips, you’ll be able to work with glass safely and avoid any accidents.
The Basics of Stained Glass Design
Now that you have all the necessary tools and materials, it’s time to start designing your stained glass piece. The first step is to come up with a basic design. You can use a sketchbook to draw out your design or you can use a computer program to create a digital design.
Once you have a basic design, you’ll need to figure out how many pieces of glass you’ll need and the size of each piece. You’ll also need to decide where the lead came will go and how the pieces will fit together.
Once you have your design figured out, it’s time to start cutting the glass.
Designing Your Stained Glass Piece
Now that you have a basic design and all the necessary tools and materials, it’s time to start cutting the glass. You’ll need to measure and mark each piece of glass so you know where to cut. Use a permanent marker or a ruler to measure and mark the glass.
Once all the pieces are marked, you can start cutting. Use a glass cutter and plenty of cutter oil to make sure the cuts are clean and precise. Be sure to wear safety glasses while cutting to protect your eyes from glass fragments.
Once all the pieces are cut, it’s time to start assembling your stained glass piece.
Choosing the Right Colors for Your Glass
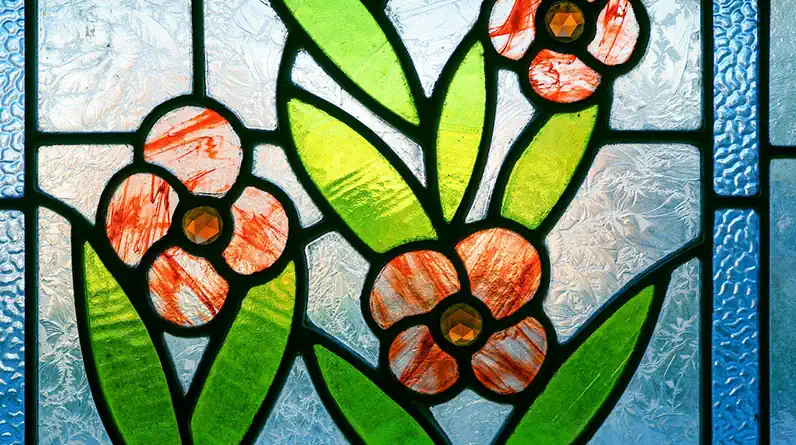
When it comes to stained glass, color is an important factor. Different colors of glass can create different effects and add depth to your design.
When choosing colors for your stained glass piece, think about the overall effect you want to achieve. Are you looking for bright, vibrant colors? Or would you prefer a more subtle, muted look? Consider the colors of the other items in the room where the stained glass will be displayed.
Once you’ve chosen your colors, you can start cutting the glass pieces.
Tips for Cutting Glass
Cutting glass is an important part of creating stained glass pieces. Here are some tips to help you cut glass safely and accurately:
- Use a glass cutter and plenty of cutter oil to make sure the cuts are clean and precise.
- Wear safety glasses while cutting to protect your eyes from glass fragments.
- Use a ruler or straight edge to ensure you’re making straight cuts.
- Take your time and make sure each cut is as accurate as possible.
By following these tips, you’ll be able to cut glass safely and accurately.
Finishing Your Stained Glass Piece
Once all the pieces of glass have been cut and arranged, it’s time to finish your stained glass piece. You’ll need to solder the pieces together to create a strong and secure bond.
Start by using flux and tinning compound to prep the pieces for soldering. Then use a soldering iron and lead-free solder to join the pieces together. Make sure all the seams are as tight and secure as possible.
Once all the pieces are soldered together, you’ll need to clean and polish the piece. Use a damp cloth to remove any flux and solder residue. You can also use a polishing cloth to give the piece a nice shine.
Finally, you’ll need to add the lead came. This will give the piece a finished look and make it more secure.
How to Display Your Stained Glass Masterpiece
Now that your stained glass piece is finished, it’s time to show it off! There are a few different ways to display your stained glass masterpiece.
The simplest way is to hang it in a window. You can use suction cups, a window hanger, or even a mounting bracket to secure the piece in the window. If you’re feeling creative, you can even create a custom frame for your stained glass piece.
Another option is to use a lampshade or a lightbox to display your stained glass piece. This will create a beautiful, illuminated display that will really show off your work.
You can also use your stained glass piece as a sun catcher. Hang it in a sunny spot and enjoy the beautiful colors as the sunlight passes through the glass.
Conclusion
Stained glass is an amazing art form that can be enjoyed by all. With the right tools and materials, you can create a stunning stained glass piece that will be admired for years to come.
If you’re looking for a unique and creative way to express yourself, why not try designing your own stained glass masterpiece? With a few simple tools and materials, you can unleash your inner artist and create something truly special.